Tuesday, May 29, 2018

Roast Chicken ~ Epicurious Style


The following two recipes are #3 and #1 on Epicurious' website for 2013 Recipes.  I have a variation of these, but I really like the technique used, and the commentary of Thomas Keller:


Pan Roasted Chicken Thighs

Serves: 4-6

Ingredients
6 skin-on, bone-in chicken thighs (about 2 1/4 pounds)
Kosher salt and freshly ground black pepper
1 tablespoon vegetable oil

Preparation
Preheat oven to 450°F. Season chicken with salt and pepper. Heat oil in a 12" cast-iron or heavy nonstick skillet over high heat until hot but not smoking. Nestle chicken in skillet, skin side down, and cook 2 minutes. Reduce heat to medium-high; continue cooking skin side down, occasionally rearranging chicken thighs and rotating pan to evenly distribute heat, until fat renders and skin is golden brown, about 10 minutes.
Transfer skillet to oven and cook 12 more minutes. Flip chicken; continue cooking until skin crisps and meat is cooked through, about 5 minutes longer. Transfer to a plate; let rest 5 minutes before serving.


My Favorite Simple Roast Chicken
Thomas Keller - Bouchon
Yield:  2 to 4 servings

Ingredients
One 2- to 3-pound farm-raised chicken
Kosher salt and freshly ground black pepper
2 teaspoons minced thyme (optional)
Unsalted butter

Preparation
Preheat the oven to 450°F. Rinse the chicken, dry it very well with paper towels, inside and out. The less it steams, the drier the heat, the better.
Salt and pepper the cavity, then truss the bird.
Trussing is not difficult, and if you roast chicken often, it's a good technique to feel comfortable with. When you truss a bird, the wings and legs stay close to the body; the ends of the drumsticks cover the top of the breast and keep it from drying out. Trussing helps the chicken to cook evenly, and it also makes for a more beautiful roasted bird.
Now, salt the chicken—I like to rain the salt over the bird so that it has a nice uniform coating that will result in a crisp, salty, flavorful skin (about 1 Tbsp.) When it's cooked, you should still be able to make out the salt baked onto the crisp skin. Season to taste with pepper.
Place the chicken in a sauté pan or roasting pan and, when the oven is up to temperature, put the chicken in the oven. I leave it alone—I don't baste it, I don't add butter; you can if you wish, but I feel this creates steam, which I don't want. Roast it until it's done, 50 to 60 minutes. Remove it from the oven and add the thyme, if using, to the pan. Baste the chicken with the juices and thyme and let it rest for 15 minutes on a cutting board.

Remove the twine. Separate the middle wing joint and eat that immediately. Remove the legs and thighs. I like to take off the backbone and eat one of the oysters, the two succulent morsels of meat embedded here, and give the other to the person I'm cooking with. But I take the chicken butt for myself. I could never understand why my brothers always fought over that triangular tip—until one day I got the crispy, juicy fat myself. These are the cook's rewards. Cut the breast down the middle and serve it on the bone, with one wing joint still attached to each. The preparation is not meant to be super elegant. Slather the meat with fresh butter. Serve with a simple green salad. You'll start using a knife and fork, but finish with your fingers, because it's so good.

See what I mean, love the part about eating the wing immediately and sharing the oysters...only someone who truly loves food will understand.

Shepherd's Pie

So, we're having our share of summer storms this year, and as usual there is a lot of thunder, lightening, and rain...gotta love the Rocky Mountains!
In wracking my brain over what to make for dinner, and looking outside to see storm clouds and rain, even though it is in the high 70's I felt the need for comfort food...Shepherd's Pie.
It has been a LONG time since the last time I had attempted this dish, and followed a recipe that was marginal at best (tweaking as I do).  I decided to give it a better try this time.  I used a large soufflé dish, and will probably make it in a lower profile dish next time, but it turned out pretty damn good, if I do say so my damn self...

SHEPHERD’S PIE
Serves 6

INGREDIENTS:
2 lbs. potatoes, such as russet, peeled and cubed
1/3 cup sour cream
1 large egg yolk
½ cup cream
½ tsp. Mrs. Dash
½ tsp. Italian Herb seasoning
Salt and freshly ground black pepper
1 Tbsp. extra-virgin olive oil, 1 turn of the pan
1 ½ lbs. ground beef
4 cloves garlic, peeled and chopped
1 onion, chopped
1 rib celery, chopped
1 stick butter, divided
2 Tbsp. all-purpose flour
1 cup beef stock or broth
2 tsp. Worcestershire, eyeball it
4 dashes Soy Sauce
½ cup frozen veggies, about ½ bag, to taste
½ cup shredded cheese, whatever you like (Cheddar, Jack, Parm)

DIRECTIONS:
Boil potatoes in salted water until tender, about 12 minutes. Drain potatoes and pour them into a bowl. Combine 4 Tbsp. butter, sour cream, egg yolk and cream. Add the cream mixture into potatoes and mash until potatoes are almost smooth.
While potatoes boil, preheat a large skillet over medium high heat. Add oil to hot pan with beef. Season meat with Mrs. Dash, Herbs, salt and pepper. Brown and crumble meat for 3 or 4 minutes. Add chopped garlic, celery and onion to the meat. Cook veggies with meat 5 minutes, stirring frequently. In a bowl, mix butter and flour together to make a paste. Stir paste, broth, soy sauce and Worcestershire sauce into meat and cook for 3-4 min. to cook out the raw flour taste. Stir in frozen veggies.
Preheat broiler to high. Fill a small rectangular casserole with meat and veggie mixture. Sprinkle cheese over meat, then spoon on potatoes evenly.  Broil 6 to 8 inches from the heat until potatoes are evenly browned.
Serve with a simple green salad for a relatively quick, easy and comforting dinner!  ENJOY!

Don't Fight The Crowds - Valentine's Day

I know it's the end of May, but just ran across this post in Hendography and wanted to post this dinner here since we've made it several times since we first had it and it has been a HIT!

Since we have been dating, Jules and I make it a point NOT to fight the crowds, put up with shitty prix fixe dinners, bad reservation times, etc.  Instead, we always make something tasty at home.
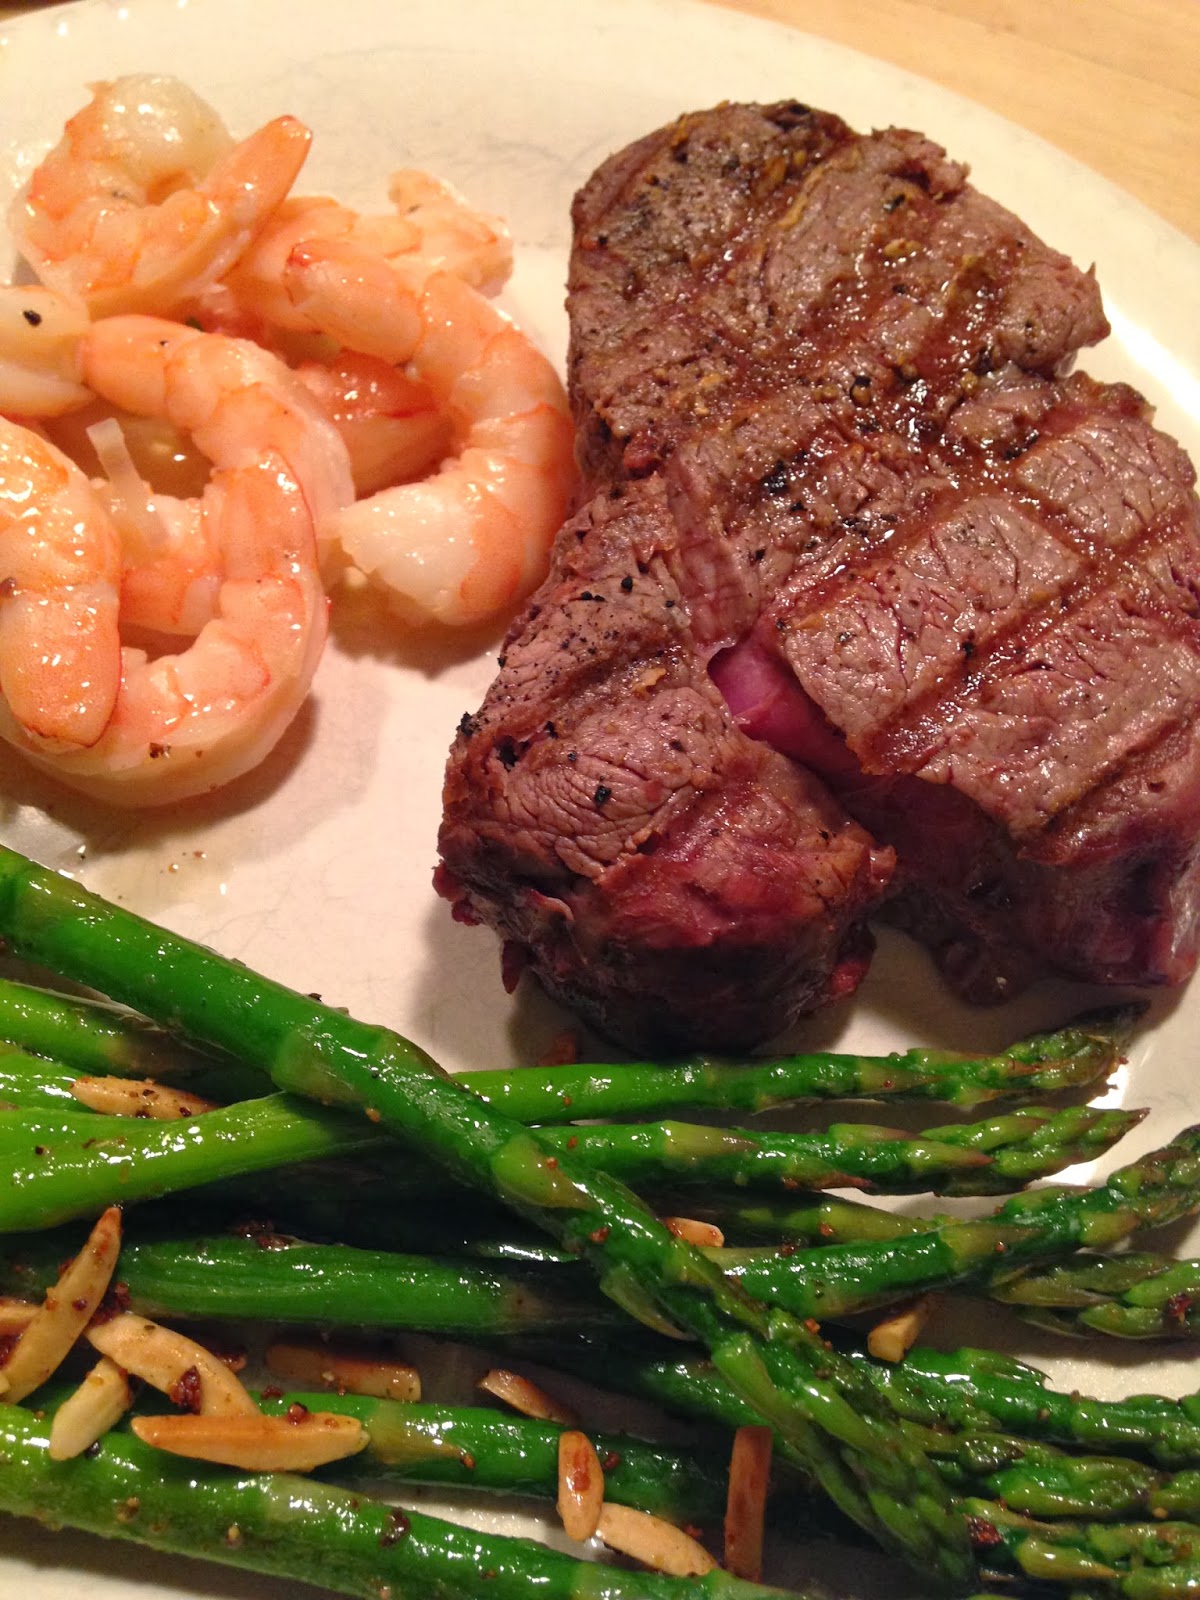
This year was no exception, the menu worked out very well and was quite delicious...

Mixed Spring Greens Salad with Grape Tomatoes, Slivered Almonds, Candied Bacon and a French Vinaigrette


Grilled Filet Mignon
Butter Poached Shrimp
Sauteed Asparagus with slivered almonds
Creme Brulee


Candied Bacon:
INGREDIENTS
1/2 lb. sliced bacon
1/4 cup brown sugar
DIRECTIONS
Cut the bacon into 1-inch strips.
Slowly brown in a large skillet over medium heat. When beginning to crisp and rendered, pour off the fat.
Put pan back on heat, add sugar and toss until caramelized. Spill out onto a non-stick tray or SilPat.

French Vinaigrette:
INGREDIENTS
3 tablespoons Dijon mustard
2 tablespoons cider vinegar
2 Tbsp hazelnut oil
2 Tbsp peanut oil
1/4 cup cream
DIRECTIONS
Whisk together the mustard and vinegar. Add the oils, blending well and then blend in the cream.

Adjust for seasoning and reserve.

Butter Poached Shrimp:
Butter poaching is a fairly classic technique involving slowly cooking food, usually shrimp or lobster, in a rich bath of butter. The end result, if done properly, is a succulent dish, slightly salty and buttery from the cooking liquid in which it swam. It is a sublime way to cook that is used in many high-end restaurants to produce memorable dishes.
Still, butter poaching doesn't have to stay in the restaurant. You can do it at home, too. Sure, you're going to need a lot of butter, but it will be so worth it.
INGREDIENTS
4 sticks butter, sliced into tablespoons-sized chunks
2 cloves garlic, finely sliced
1/2 teaspoon black pepper
1 medium shallot, finely sliced
1 pounds 18-20 count shrimp, peeled, deveined, uncooked
DIRECTIONS
In a skillet over medium heat, add the butter, garlic and black pepper.
Melt the chunks of butter until you have a skillet full of melted butter.  Try to keep the temperature low to avoid separating the butter.
Immediately after the butter has melted, add the shallot and shrimp.
Cook them for 10-12 minutes or until the shrimp has cooked through.
Serve immediately.

Creme Brulee:
Serves 6
INGREDIENTS
Unsalted butter, for greasing
6 large egg yolks
6 tablespoons sugar, plus more for browning
1 1/2 cups heavy cream
DIRECTIONS
Preheat the oven to 275°F.
Line a 9-by-13-inch glass baking dish with a kitchen towel. Butter six 4-ounce ramekins and place in the dish.
In a medium bowl, whisk the egg yolks with the sugar until the sugar dissolves, about 2 minutes. Whisk in the cream.
Divide the custard among the ramekins.  Place the dish in the oven and pour enough hot water into the dish to reach halfway up the sides of the ramekins. Bake for about 1 hour, until the custard is just set but still slightly jiggly in the center. Let the custards cool in the hot water bath at room temperature for 30 minutes.
Remove the custards from the water bath and let cool completely. Wrap the ramekins in plastic and refrigerate for at least 2 hours.
To serve, sprinkle the tops of the crème brûlées with an even layer of sugar and use a blowtorch to caramelize the sugar. Serve immediately.
NOTE: The crème brûlée can be prepared through step 3 and refrigerated for up to 2 days.

Corned Beef & Cabbage

Corned Beef and Cabbage
Every St. Patrick's Day I make a huge pot (about 9 lbs.) of Corned Beef with the necessary veggies (carrots, celery, potatoes and cabbage).  Served with some malt vinegar for the cabbage and a mustard sauce, it's a great meal for the whole family!
We used to have a dessert of Guinness floats, but since I don't imbibe any more we have whatever else sounds good.

Beef:
3-4 lbs. Corned Beef (Flat cut or end cut) with Herb/Seasoning Packet
3 cloves garlic
1 onion - cut in quarters
1 celery stalk - cut in 1" pieces
1 Bay Leaf
2 Bottles of Beer (whatever you like)
Cold water to cover
Bring to boil, reduce to med-low and cook for 3:30 (3 1/2 hrs.)

Veggies*:
Red potatoes - quartered (about two per person)
Carrots - cut diagonally into 1" slices (about one per person)
Green cabbage - cut into 6 wedges with core intact (more if desired)

At 2:45 add potatoes
At 3:00 add carrots and cabbage

*I have been roasting the carrots and potatoes (tossed with Olive Oil, S&P and crushed garlic) in the oven on 350°F Convection for ~20 minutes (or until tender when pierced with a knife), and that's just as tasty if not better.

Remove meat from pot and let rest for about 10 min.
Serve veggies around roast and enjoy!

Mustard Sauce
2 Tbsp Dijon mustard
1 Tbsp Yellow mustard
1 tsp Horseradish
Mix thoroughly and add anything else you would like to taste (favorite hot sauce, splash of beer/Irish Whiskey, sour cream...the possibilities are endless).

The Salad Days...

My Dad found some recipes for my Grandpa Henderson's (Art) salad dressing - I remember it always being amazing...

Then there's this one, that seems to be the same...

I'll have to try them out to see which is better...TBD

Sunday, May 27, 2018

Notes On Entertaining - Party Portion Control

The way things are at our house, relatively open to friends and family, there have been times where we have had some additional guests at dinner that may have been...shall we say...unexpected.  I found an article that helped me put into words what we usually do...
Adapted from an article on TastingTable.com..

PORTION CONTROL
How to plan the right amount of food for a dinner party 


We don’t do a ton of large dinner parties, but we do ‘entertain’ the family and friends on a regular basis.  It doesn’t always happen, but every once in a while we’ll have ‘extra’ guests show up.  I have come to realize a couple of things: a) it’s never a bad idea to cook a little more than you think you'll need, and b) As long as the cook is calm, the guests will be calm. I don't think they even had a clue that I had to stretch the food. Nevertheless, here are a few tips for figuring out how much to make for your next dinner party.

Sketch out your menu first. Once you've decided what you're having, you can start thinking about portion sizes. As a general rule, the more dishes you serve the less of each you need to make.

Play the numbers game. Throw out the old-school recommendation for eight ounces of protein per person: With individual pieces of meat or fish, plan for about four ounces per person instead, or roughly the size of a deck of cards. For pasta, plan on about one cup per person, and for other sides like grains or vegetables, shoot for about a half cup each—unless it's a leafy salad, in which case you should budget about ¾ cup per person.

Sometimes less is more. With roasted meats and stews, the four-ounce recommendation can go out the door. If you cook a large chunk of meat and slice it thinly, people will end up eating far less than if you serve individual steaks, pork chops or a rack of lamb. The same goes for a stew or casserole.

Recipe servings are merely a guide. Recipe amounts are written as though that dish is the only thing you're eating for your meal. So if you see a salad recipe that says it serves four, and you're making it as part of a large buffet spread, chances are that salad will stretch to feed six or eight people.

Plan pre-party bites carefully. Limit appetizers to just one item you have to make—say, wings, crostini, cheese plate, or shrimp cocktail and fill things in with other things you don't have to prep much, like little bowls of olives or roasted nuts. You don't want people filling up before the main event—you're just providing something for them to nibble on while you finish. If you're having cocktail hour before dinner, plan on serving enough for people to have three to five bites of food along with their drink.

Keep dessert servings small. At the end of a three-hour dinner party, your guests aren't going to want a big slab of pie or wedge of cake—just a little something sweet will suffice. A flourless chocolate cake recipe might say it feeds eight, but you can slice it into 12 slivers and garnish each with a dollop of fresh whipped cream and raspberries to fill out the plate. The goal is to leave your guests wanting more, not waddling home stuffed.

Bottom line…Relax and enjoy the party as well!

Game On...Wild Game Preparation

Wild Game Preparation...R&D for a Buddy
Here in the West, a lot of people spend days if not weeks out of the year (usually in the Autumn months) camping out, hunting, and bonding with friends and family.  Not long ago, a friend approached me on the proper way to prepare wild game.  While I do have experience eating (and enjoying) everything from Caribou to Elk, Deer and Moose; and even wild boar and rattlesnake, my experience cleaning and dressing of the animal is somewhat limited.  The raw meat we have enjoyed had been prepared by someone with a lot more experience than I had, usually Julie’s grandfather or uncle.  To provide better feedback for my Buddy, I did some serious R&D at home, with my family and tried to come up with the best way to prep and serve Wild Game.  Here's what I came up with...
Wild deer lead unpredictable lives with widely varying diets. That means their meat can range from tender and veal-like to strong and gamey, which poses a problem for venison-loving cooks. Although a hint of gaminess is a welcome reminder that you're eating wild-caught meat, anything more than that quickly becomes a fault. Although much of the game, or gamey, taste of venison occurs during the cleaning and dressing of the deer. The more care that is taken during this process, the less gaminess the meat will have. Yet some older bucks and does will retain a game flavor, no matter how meticulous the cleaning process. Some venison has a stronger flavor than others primarily because deer eat a varied diet of weeds, acorn and wood bark. If their diet consists of more acorns than greens the venison will have a "gamier" taste.
Harvested during fall hunting seasons, venison is a lean meat that is lower in fat and calories than an equal-sized portion of beef or pork. Likewise, venison also has less cholesterol than other meats. Fortunately, there are several well-proven techniques to reduce or mask the musky gaminess of wild venison…

Diligent Trimming
With domestic meats such as beef or pork, seams of fat or connective tissue aren't necessarily a flaw in the meat. Both break down as the meat cooks, lending flavor, richness and juiciness to the finished meal. With venison the situation is rather different, because much of the undesirably gamey flavor is concentrated in precisely those tissues. Before cooking your venison, use a sharp knife to trim away any surface fat or large seams of fat between the muscles. If the cut has any observable connective tissue or "silverskin" -- the thin, silvery sheath that encloses some muscles -- trim those away, too.

Soak in Buttermilk
A good way to remove a lot of the gaminess is to soak the venison in milk or buttermilk, which -- like a brine -- leaches away some of the meat's own strong flavor. Food scientists have noted that possibly because of naturally occurring enzymes, dairy products also tenderize the sometimes-tough meat more effectively than traditional acidic marinades. Soaking the meat overnight in buttermilk will help remove the blood from the meat that may be causing a gamey taste.  Slice the fat and silver skin off the venison if there is any present. You want the buttermilk to be able to get into the meat. Rinse the venison in cold water. Place in a large enough bowl that you have enough room to cover it with the buttermilk. Poke holes in the venison with a fork to allow buttermilk to soak into the venison.  Pour enough buttermilk over the venison to cover it entirely. If you do not have buttermilk you can use whole milk and add 1 tbsp. of vinegar for each cup you use. This makes a buttermilk substitute. Let soak at least 90 minutes. You can soak overnight or up to 24 hours. Rinse the buttermilk off the venison. Cook using the recipe of your choice.

Quick Brining
Soaking meats in a concentrated salt solution is a centuries-old preservation method, used to prepare hams and corned beef, among other cuts. If you reduce the percentage of salt, and soak your venison for just hours instead of days, the brine will draw out a portion of the natural juices from your venison. The meat absorbs some of the brine as well, seasoning the meat deeply and diluting its gamey flavor. Brining has the added advantage of helping meat stay moist when cooked, a significant benefit with lean, easily overcooked venison. Rinse thoroughly after brining.

Using Marinades
Some venison and wild game recipes call for strongly flavored marinades to tame the wild-caught flavor. Traditional mixtures include ingredients such as red wine and red wine vinegar, garlic, onions and strong, woodsy-tasting herbs such as rosemary and juniper berries. These are all potent flavors in their own right, and counter the meat's gamey flavor by meeting it head-on and overpowering it. Marinade the meat in your favorite acid-based beef marinade for up to 24 hours before cooking. If you don't have a favorite marinade recipe, you can use oil and vinegar-based Italian salad dressing. When marinating venison, use a base of lemon juice, wine, vinegar or other acid. This will help draw out the gamey taste of the meat. Make a fresh batch of marinade to brush the meat while it is cooking.

Strong Seasoning
When a gamey flavor persists despite your best efforts, flavoring the dish generously is the final weapon in your arsenal. Deep, complex flavors like good curry or chili powders can mask a lot the gaminess of your meat. Earthy, smoky spices such as cumin, paprika and chipotle are especially good at this. Long, slow cooking in a flavorful sauce will usually subdue the meat's gaminess to a tolerable or even an enjoyable level. If the spiciness of curry or chili doesn't appeal to you, a rich tomato sauce or mushroom sauce has a similar effect without the heat.

Other Suggestions
Age the meat in the refrigerator for three to seven days. This will help to improve the flavor of the venison.

Never add salt to raw venison. The salt draws the natural juices out of the meat, making it dryer.

Venison is a very lean meat and as it is low in fat content, it tends to dry out rather quickly. Venison should not be overcooked. Venison should be cooked to no more than medium-rare for the best flavor. Overcooking can cause the meat to become tough and stringy.

You can wrap cuts of meat from older bucks and does in bacon to add moisture and flavor to these tougher venison steaks and roasts.
Ground Venison

Place the ground venison in a bowl. The size of the bowl is determined by the amount of meat that you will soak. Make sure the bowl is large enough to hold the milk as well. Pour milk or buttermilk over the ground venison until it is completely covered. The amount of ground venison and the size of the bowl determine the amount of milk used. Cover the bowl with a lid or plastic wrap and refrigerate for 12 hours or overnight. Drain the milk from the bowl and rinse the meat in cold water. Rinsing the meat ensures all milk and blood are removed from the meat, further removing the "gamey" taste.
Ground venison can be flavored with herbs and spices to help cut the gamey taste of the burger.  To prevent the venison from drying out during cooking, preheat the oven or grill and when pan frying, make sure the pan is hot before adding the meat.

Cast Iron Care

THE TRUTH ABOUT CAST IRON
Adapted from an article on Epicurious


Cast iron cookware holds a special place in our culinary hearts because it's economical, durable, versatile, holds heat well, and cooks food evenly. Properly seasoned and maintained, cast iron can last for generations and sustain a longer-lasting easy-release surface than contemporary non-stick pans. But in order to do all this, cast iron has to be well taken care of. And that's no small task, because no other piece of cookware incites greater debate and panic over its care and maintenance.
 
1. Wash with soap only once.
When you purchase a piece of new or used cast iron cookware it's okay to use mild soapy water for the first washing. But that's it! Avoid harsh soap and scouring pads thereafter because they can remove the seasoning you'll be trying so hard to achieve. And don't even think about running your pan through a dishwasher.
2. Season your pan.
We're not talking about salt and pepper here. "Seasoning" on a pan is fat or oil baked into the iron, which helps create a natural non-stick coating. The more you use your pan, the more seasoned it will become.
To season a cast iron pan, preheat the oven to 300°F. Place a layer of foil on the bottom rack of your oven and the pan on the top rack. Heat the pan for 10 minutes and remove. Using a cloth or paper towel, coat the pan with about 1 tablespoon of vegetable shortening, lard, or bacon grease. (Don't use vegetable oil—it creates a coating that feels sticky.) Place the pan back in the oven for another 10 minutes. Remove and pour out any excess fat or oil. Turn the pan upside down and return it to the top rack of the oven (position it over the foil to catch any drips). Bake for 1 hour, turn off the oven, and let the pan cool in the oven. Repeat this process often to maintain and intensify your pan's seasoning. Some new pans are labeled "pre-seasoned" but we recommend seasoning them at home anyway to create a stronger seasoning bond.
3. Get cooking!
Cast iron cookware is great for everything from pan-searing pork chops to baking cornbread. With new pieces, we recommend starting off with foods with a high fat content (like bacon) to help with the seasoning process and solidify the non-stick surface. Note: never store food in cast iron. Acids in food can break down the seasoned surface.

4. Keep it clean.
We don't recommend letting your cast iron soak. Wash your (preferably still warm) pan with hot water and use a sponge or stiff non-metal brush to remove cooking residue. To slough off tough bits of stuck-on food, pour a cup of coarse kosher salt into a still-warm skillet. Squeeze a folded kitchen towel with tongs and scrub the pan with the salt. Toss the salt and rinse the pan with hot water.
5. Dry it completely, every time.
Moisture is the enemy. Not properly drying your cast iron can cause it to rust. So after rinsing, dry it well and place it on the stove-top over low heat. Allow to dry for a few minutes, then use a cloth or paper towel to rub it with a little shortening, lard, bacon grease, or vegetable oil. Heat for 5 to 10 minutes more, remove from heat, and allow to cool. Wipe with another cloth or paper towel to remove excess grease.
6. Store it carefully.
Keep your cast iron cookware in a dry place with the lids off to avoid rusting. If rust appears, scour your pan with steel wool to remove it and re-season the pan.

Comfort Food - Coq Au Vin

Love this dish, and have had some really good preparations and some that were marginal, at best.  Found a recipe and with a few tweaks, came up with something we really like, and isn't too difficult...

QUICK COQ AU VIN

The Coq au Vin can be made in advance, covered and simmered over low heat on the stove or in a 275°F oven until ready to serve.  If slow cooked, you will need to add more chicken broth or wine to keep the sauce from getting too thick.  Chicken thighs are also recommended to avoid dry chicken if cooking all day.
Yields: 4-6
Total time: 45 minutes

INGREDIENTS
4 thick cut slices bacon, chopped
4 Tbsp.  olive oil, divided
Salt and pepper, to taste
1 sweet onion, diced
4 cloves garlic, minced or grated
2 Stalks Celery, chopped in ½” pieces
2 medium size carrots, chopped in ½” pieces
2 Tbsp. tomato paste
1 ½ lbs. boneless chicken tenders or small chicken breasts chunks (may sub thighs if desired)
2 cups button mushrooms, sliced
2 cups red wine, plus more if needed
2 cups chicken broth
2 bay leaves
4 whole sprigs fresh thyme
1/2 cup fresh parsley, chopped

DIRECTIONS
Heat a large skillet or Dutch Oven over medium-high heat and cook bacon until crispy.
Add another drizzle of oil if needed and then add the onion, garlic, carrots and celery. Cook the veggies, stirring often until soft and lightly caramelized, about 5 minutes.
Stir in the tomato paste and then remove the veggies from the pan and set aside.
Add a drizzle of oil to the pan if needed.  Season the chicken with salt and pepper. Place the chicken in the hot pan and sear on both sides until browned.  About 4-8 minutes per side, depending on how thick your chicken is. Remove chicken from the pan and set aside.
Add veggie mixture back into the pan, and toss in the sliced mushrooms and cook another minute or two.
Slowly pour in the red wine and chicken broth.  Add the bay leaf and thyme and season with salt + pepper.  Gently stir everything to combine then add chicken and then bring the sauce to a boil, reduce the heat to medium and simmer for about 15 minutes or until the sauce has reduced by about 1/3.
To serve, remove the bay leaf and thyme from the Coq au Vin.  Serve with mashed potatoes, chicken on the side of the mashed potatoes and then ladle the sauce & veggies over the chicken.  Sprinkle with fresh parsley or finely chopped chives.

More Chicken 'One Pot' Recipes


I have been trying to come up with more tasty ways to prepare chicken that are quick and easy.  This one pan dish is based on a dish names for a village in northwest Italy and is usually prepared with veal, but chicken is as good if not better in this case...Enjoy!

CHICKEN MARENGO
Total Time: 35 min (Prep: 20 min Cook: 15 min) Yield: 4 servings


INGREDIENTS
3 large chicken cutlets, sliced into thin paillards (slice while partially frozen)
Seasoning: Lawry’s Season Salt, Garlic Powder, Mrs. Dash to taste
½ cup all-purpose flour
3 Tbsp. vegetable oil
1 medium sweet onion, sliced
2 cloves garlic, diced
2 tsp. flat leaf parsley, chopped fresh
1 tsp. fresh thyme, or 1/2 tsp. dried thyme
½ lb. mushrooms, quartered
1 yellow bell pepper, seeded and julienned
2 Tbsp. tomato paste
1 Tbsp. soy sauce
½ cup white wine
½ cup chicken broth
1 (14-ounce) can chopped tomatoes
2 Tbsp. butter
DIRECTIONS
-Season the chicken with seasoning, to taste, and lightly dredge in flour.
-In a large sauté pan, heat the oil over medium-high heat and add the chicken. Brown on both sides, until nicely golden, about 3 minutes per side. Remove from the pan and set aside on a plate.
-In the same pan, add more oil, if needed, along with the onion, garlic, mushrooms and peppers and sauté until softened and fragrant, but not limp, about 5 minutes. Season with salt and pepper, to taste.
-Stir in the tomato paste and cook a few minutes to cook out the raw flavor.
-Turn up the heat, and add the wine/wine to deglaze the pan and let it reduce for 2 or 3 minutes.
-Add the chicken broth, soy sauce and tomatoes. Once the mixture begins to bubble, add the browned paillards and any juices from the chicken and reduce the heat to a simmer. Cook until the chicken is warmed through, about 3 minutes.
-Turn the heat off and stir in the butter. Transfer to a serving platter and serve immediately over rice or pasta.

Note: You can definitely use boneless, skinless thighs as well.  I would pound them to about 1/2" and follow directions above.

14 Things You'll Need In Your Kitchen To 'Adultify' It...

Since I have three children already living on their own, and another almost there (soon to be graduating High School and going to the UofU), I found the article I found on Tasting Table both timely and of value...
The 14 Products You Need to 'Adultify' Your Kitchen
Copied from a Tasting Table (I love that website!) article by Bailey Bennet
Soothe those growing pains with the simple, vital tools you need to get started.  Think back to when you were 23. Whether that was three weeks ago or 30 years, you remember what it felt like to live on your own for the first time. Suddenly, so many truths hit you: Couches are really expensive, food goes bad in the fridge insanely quickly and common household items you once took for granted are absolutely essential.
During this new phase of your life, you have to outfit your kitchen with products you never considered before. They’re obvious, inexpensive and not hard to find, but they’re all things that help ease the awkward transition from adolescence to adulthood.
That’s where this list comes in. These are the kitchen items you need in order to truly call yourself an adult. Some might seem very straightforward. And we get it. But you’d also be surprised how many people suffer through life without a good bottle opener.
Pot holders - If you’re going to start cooking for yourself, you’ll need something to grab those hot pots and pans. No, you cannot use paper towels. They don’t really work, and think of the trees!
A set of matching wine glasses (more than two!) - Sure, you can drink wine out of pretty much anything (bottle included), but having a matching set of wine glasses that you can pull out when friends come over is a serious adulting move.
Coasters - You spent good money on that furniture. Save it from the dreaded water ring.
Serving dish or platter - Someday you’re going to cook a meal you’re really proud of, and you’ll want to serve it to your guests on something worthy of your culinary masterpiece. Invest in a serving dish (or two) for just that occasion.
Steak knives - You cannot use a butter knife for everything. You’re an adult now.
Wine bottle opener - There are plenty of great hacks for opening a bottle of wine (with your shoe, on the wall; the list goes on). You know what’s the easiest way? Using a bottle opener.
Can opener - Stop jabbing at your can of beans with a knife. When it comes to opening cans, there is no substitute for the thing literally designed to open cans.
Cutting board - If you live in a major city, you probably have a tiny kitchen with an abysmal amount of counter space. But that’s still no excuse for chopping anything on that counter without a cutting board.
Baking sheet - Adult secret No. 1,345: You can make basically anything in your oven using a baking sheet, including a full meal. It is worth every penny.
Tupperware - On those rare days you have the foresight to pack yourself a work lunch, you’ll be glad not to reuse the container from last night’s Chinese food.
Cocktail shaker - Let’s get real. Have you ever NOT been impressed by someone mixing you a cocktail in their kitchen with an actual cocktail shaker? Be that person.
A coffeemaker of your choice - If anything’s going to get you through adulthood, it’s coffee. Sure, you could buy a $3 cup every day on the way to work, or you could purchase a decent coffeemaker for about $25. Now we’re feeling grown.
Drawer organizers - Don’t allow your kitchen drawer to become a bottomless pit of despair. Declutter your utensils, and you’ll instantly feel better about yourself.
A spice rack - This might be the ultimate sign of adulthood: a signal that not only do you own more spices than just salt and pepper, but you have so many that you actually need to display them. Piling them into a cabinet makes them impossible to sort through when you’re in seasoning mode, so invest in a spice rack to keep them easily accessible for all that adulting you’re doing.


Healthy Snacks

On occasion I find I have a sweet tooth but want something healthy.  That way I can feel good about grabbing a piece or two...
OATMEAL BARS
When you have a sweet tooth and want to stay on track, here’s a nice treat.
Sugar is NOT an added ingredient.

3 mashed Bananas
1/3 cup Apple Sauce
2 cups Oats
1 tsp Vanilla
1 tsp Cinnamon
¼ cup Almond Milk
½ cup Raisins (optional)
½ cup Craisins (optional)
¼ cup Chocolate chips (optional)
¼ cup slivered almonds (optional)

Bake at 325°F for ~45 min.  Let cool, then cut into desired bar size.

Best Pot Roast?..This could very well be the one!

In my opinion, there's really not a better comfort meal than a slow cooked, saucy Pot Roast on a cold, rainy or snowy day.  After years of trying many adjustments to the recipe I knew as a kid, I heard about this recipe from a restaurant in Southern California - Jar.  Apparently they have a pot roast on their menu that is so good it sells out regularly...I've never been to Jar, but have cooked this recipe many times and the popularity doesn't surprise me.
my favorite Pot Roast Recipe:
Jar Pot Roast
Yield: 6 to 8 servings 
Active Time: 20 minutes 
Cooking Time: 3 hours

Ingredients:
3 tablespoons olive oil 
1 1/2 teaspoons kosher salt, freshly ground pepper to taste 
1 denuded short rib or boneless short ribs, 3 to 5 pounds 
3 carrots, peeled and chopped 
1 medium onion, coarsely chopped 
3 stalks celery, coarsely chopped 
1 leek, white and light-green parts coarsely chopped 
1/2 bulb of garlic, cloves smashed but unpeeled 
1 bay leaf 
1 cup sherry 
3 to 4 cups chicken stock 
2 tablespoons finely chopped parsley
 
Directions:
Set rack to the lower third of the oven. Preheat oven to 375 degrees.
Dry beef with paper towels, season with salt and pepper.
Set a Dutch oven on high heat until it is very hot; add oil and heat until just smoking.
Sear beef until it is a deep, rich brown, about 3 to 5 minutes a side.
Remove beef from pot; discard all but a teaspoon of fat.
Add sherry to pot and reduce by half, about 4 minutes, while scraping up flavorful brown bits with a wooden spoon.
Put all vegetables into pot and cook until slightly soft, about 5 minutes.
Add bay leaf and beef, with any accumulated juices, then pour on chicken stock until the beef is three-quarters covered. Cover pot with tin foil or a tight-fitting lid and place in oven. Check after 15 minutes to make sure liquid is simmering lightly; adjust heat as needed. Continue cooking for a total of three hours.
Allow the meat to cool in the liquid. When cool, degrease, either by using a degreasing pitcher or by chilling in the refrigerator and removing most of the hardened fat from the surface of the liquid.
 
To serve, place a colander over a large bowl. Remove meat from liquid. Strain the liquid, pressing down on vegetables to remove all the juice. Discard vegetables. Return the meat to the liquid and reheat. Cut meat into portions and place each in a pasta dish; spoon a generous portion of the braising liquid around the beef. Top with a spoonful of caramelized onions and a roasted carrot. Sprinkle with parsley. Serve with Horseradish Cream.